Setting up an integration user with the new „Salesforce Integration user license“ turned out to be much less intuitive than I anticipated. That’s why I wanted to share a very quick and on-point guide how to set them up correctly. I will spare you the yadda-yadda about what they are, how great they are, and why you should use them. So lets get to it.
What You Need
The new license consists of two components:
- A new standard profile Salesforce API Only System Integrations of the license type „Salesforce Integration“.
- A new permission set license Salesforce API Integration
You need both to make this work.
Create a Salesforce Integration User
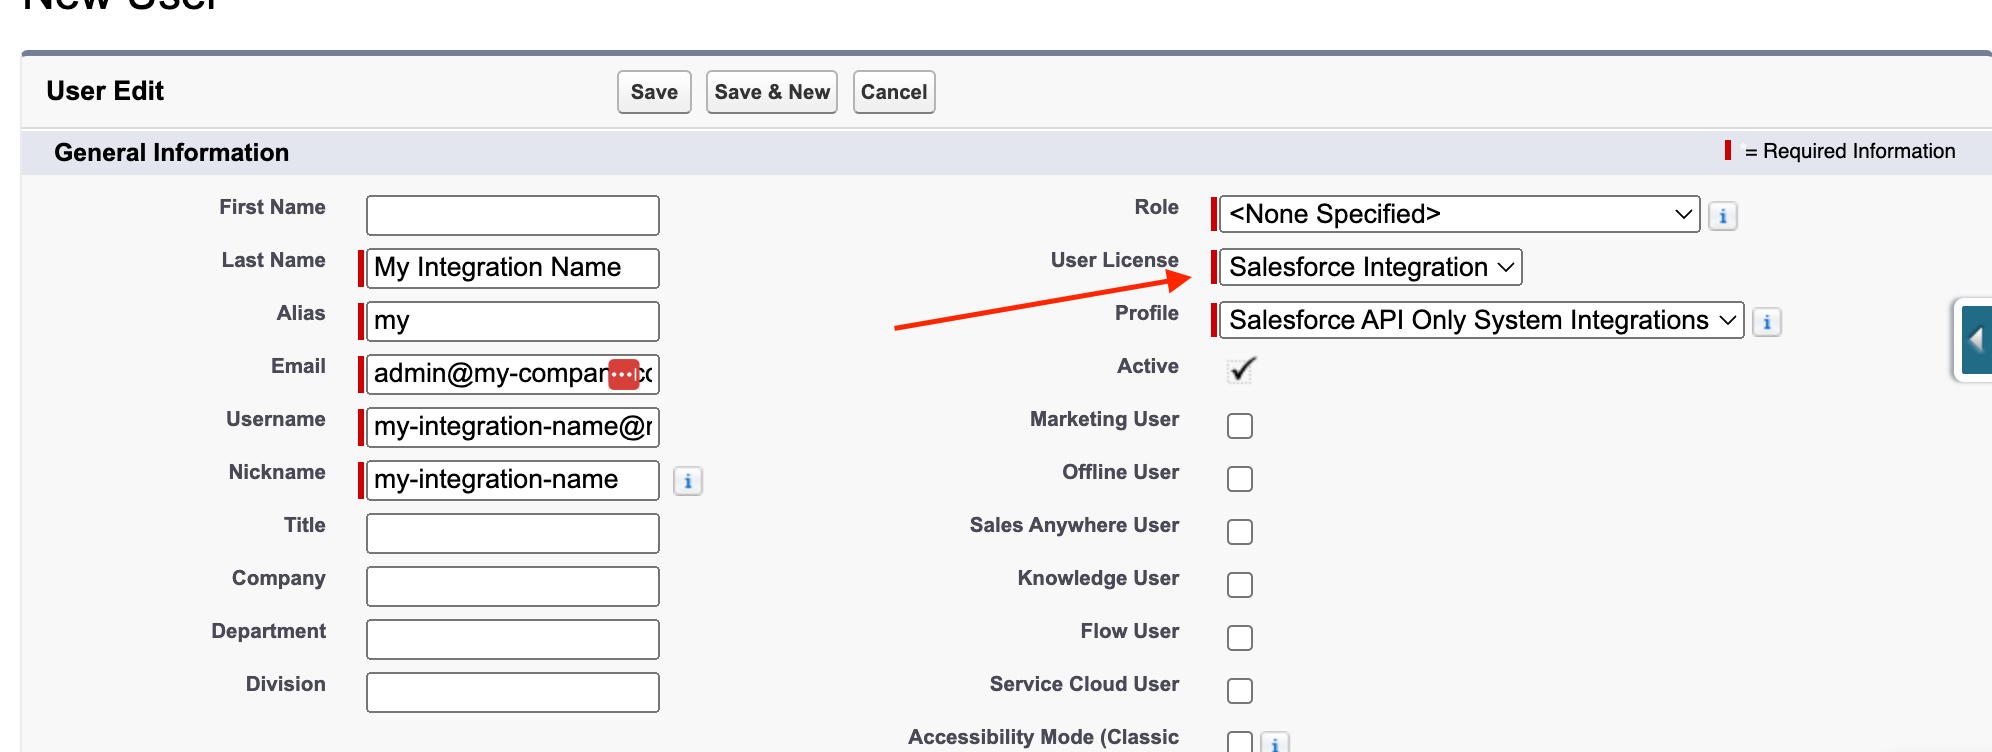
You can reuse old integration users and just change their license type, but I recommend to create a new user.
- Give a useful name and alias (should include the name of the integration).
- As the user’s email, select an email that you control.
- As username, I recommend the name of the integration.
- Select the new „Salesforce Integration“ user license. The standard profile is automatically selected for you.
- Hit dat save button.
The new profile is essentially the „Minimum Access“, with even less access. There is no need to clone it. You do not want this profile to have any permissions at all.
As a final step, assign the Salesforce API Integration permission set license to the newly created user. This is required to be able to assign regular permission sets to this user.

No you’re all set. You have a user created that cannot log in and can’t do anything. Great.
Assign Permissions To Your Integration User
Now we can move on and create the permissions we want. I assume you are all familiar with the principle of least privilege, so I recommend to go talk to your dev team and ask them to create integration permission sets for you. Just make sure, that your permission set does not specify a license.
If you select „Salesforce“, the permission set cannot be assigned to your „Salesforce Integration“ user. If you select „Salesforce Integration“, the permission set cannot contain permissions for standard objects.
This is the critical part: Only a permission set with License „–None–“ allows you to grant permissions for all standard and custom objects.
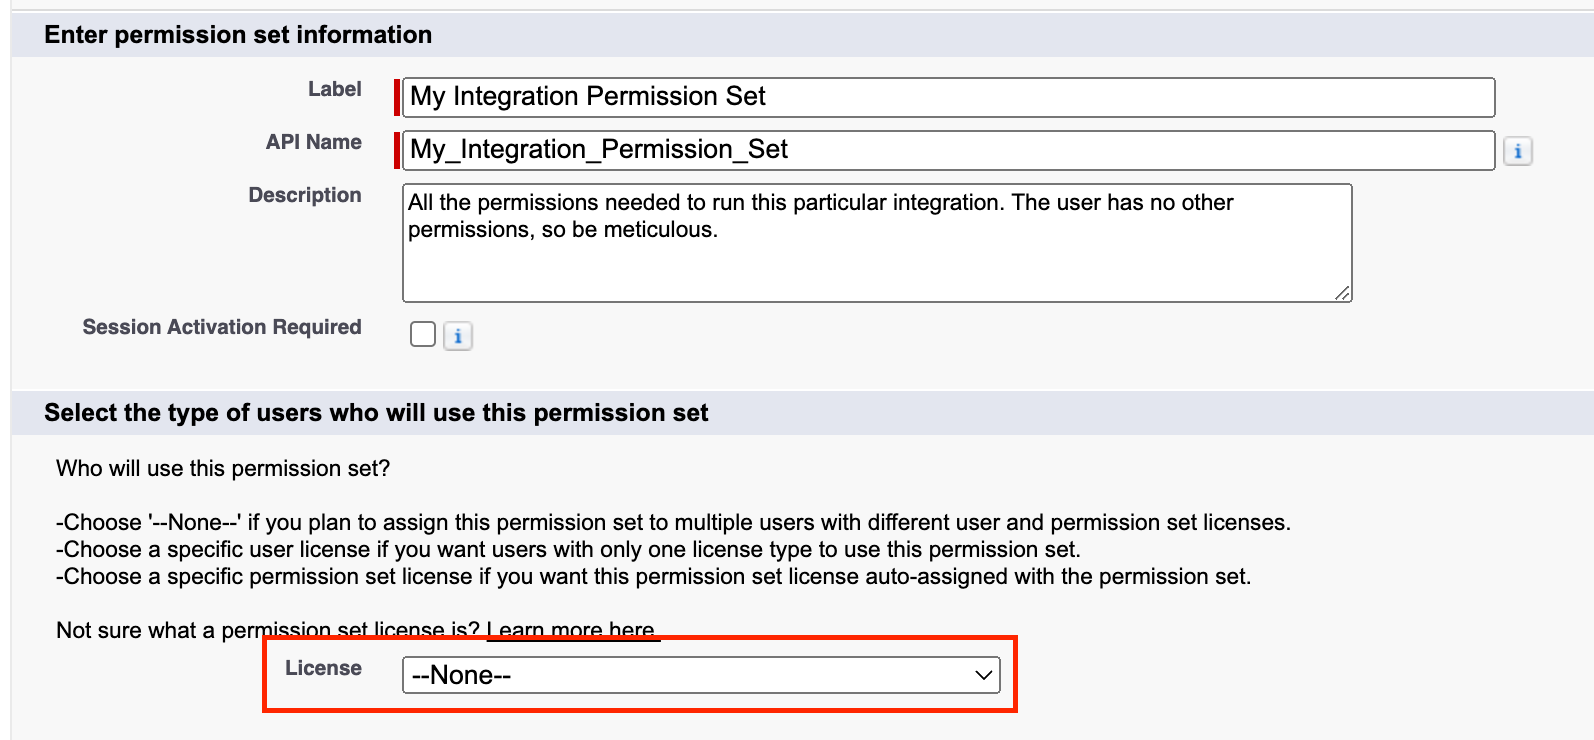
Now all you need to do is assigning this permission set to your integration user.

Enabling Integration License Users for Headless Authentication
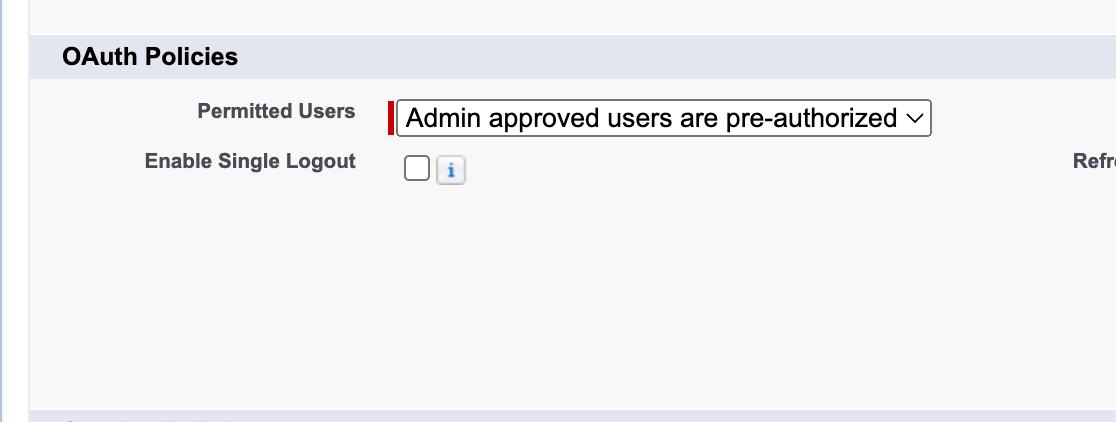
If you plan to use this license in system-to-system integrations (which is recommended), there’s only one more thing you need to do: Pre-authorize the user in the connected app, that the integration uses.
Go to Setup > App Manager > Your App > Manage (Drop Down) and „Edit Policies“. Select „Admin approved users are pre-authorized“ and add the standard profile.
Or, if you’re lazy, just add this snippets to the metadata of your connected app and deploy the source.
<?xml version="1.0" encoding="UTF-8"?>
<ConnectedApp xmlns="http://soap.sforce.com/2006/04/metadata">
...
<oauthConfig>
...
<isAdminApproved>true</isAdminApproved>
</oauthConfig>
<oauthPolicy>
<ipRelaxation>ENFORCE</ipRelaxation>
<refreshTokenPolicy>infinite</refreshTokenPolicy>
</oauthPolicy>
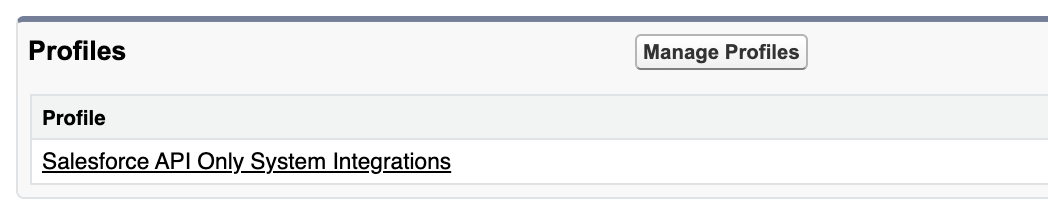
<profileName>Salesforce API Only System Integrations</profileName>
</ConnectedApp>Test The Integration License User
The by far easiest way to test the permissions of the new integration user is the standard CLI. Simply authenticate using the sfdx auth jwt grant command.
sfdx auth jwt grant -o [email protected] -r https://test.salesforce.com -i $CONSUMER_KEY -f server.keyAnd run a query using the integration user as --target-org
sfdx data query -q "SELECT Id,Name FROM Account LIMIT 10" -o [email protected]If you did not assign a permission set yet (or your assigned permission set does not contain access to the Account object, you should see an error like this.

Conclusion
And that’s it. You’re done. You just saved your company up to 1500 EUR per active integration (depending on your company discount). Go ask your boss for a raise. For all the hasty people, here’s a summary of what to do, without the pictures:
- Create User with „Salesforce Integration“ license type. Use the standard profile.
- Assign „Salesforce API Integration“ permission set license to the user. Very important.
- Create and assign the permission sets you need for the user. Remember principle of least privilege.
- Enable headless authentication by pre-authorizing the standard profile in your connected apps.
Hope this helps!